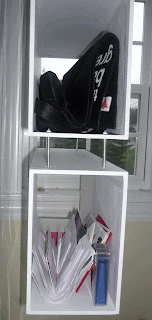
i'm working on turning our one spare bedroom into a home office/playroom/guest bedroom. a little lofty, considering the room is only 9' x 11'! my first project is building myself a little desk that can be tucked away when eden and i need some room to play. so, how about a desk that swivels?
Monday, November 10, 2008
Monday, October 20, 2008
idon storage shelf
i know, i know....i took a little two week hiatus. i was busy building this....
this is my idon shelf (finally something named after my husband - he's been waiting awhile!). idon is an acronym for idea icon. this shelf is three rotating cubes within three cubbies. each cube is 6" x 6". i painted a different design on each of the sides and back to match up as you rotate the cube.
it funny how after you build something you think about how simple it was and what took so long?!
Monday, September 29, 2008
work in progress
i like doing this blog for two reasons - one, it gives me weekly goals and two, it's nice to have all of my projects in one place. but, on the flip side, i sometimes avoid more complicated projects in order to post once a week. i have a few big projects that i have stuck in my head that need to come out! the project i'm working on now is a little complicated. i spent last week working it out by building little models out of cardboard to make sure it would work. these boxes are going to eventually rotate!
i've approached the nova scotia designers crafts council to see if i can become a member. in order to become a member you have to submit three pieces to be judged. i'm hoping this one will work out as a submission. my jury session is october 10th...yikes! stay tuned!
crazy cool tables
i'm a bit of a new design junkie. i'm addicted to being wowed by other peoples ingenuity. these two tables definitely impress. i want the marble table above by tineke beunders . how clever and fun!
i love this musical coffee table by tor clausen, too. how much fun would this be with a couple of kids (or a couple of drinks!).
Monday, September 22, 2008
a baby duvet
what happened to summer? we've had to put the heat on two nights in a row! so, i thought it was time to make a little baby duvet for eden. luckily, my mum had an old duvet that she was happy to let me cut up! cutting up a duvet was crazy...i felt like i was working in a snowglobe for a couple of hours - down feathers everywhere! i'm still picking feathers out of my sewing machine.
out of one queen sized comforter i was able to make two baby duvets and one twin duvet. this one was covered with a cute hot pink fabric.
just two pieces of fabric sew together, a slot made for the duvet to fit through.
i'm going to pack away my sewing machine now and move back to the table saw! i have some projects stacking up in my head.
Monday, September 15, 2008
table cloth slipcover
this is a project born out of necessicity. i built two benches for my kitchen table over a year ago and made up little cushions for each. i covered them in a gorgeous green textured material...that just got demolished by eden and her new love of throwing food! so, off came the soiled green material, on goes a funky vinyl material.
not so easy to find a great pattern in vinyl. after a couple of trips to the local fabricville i was feeling discouraged. then i go shopping at the local superstore and see the summer stock of vinyl table cloths on sale for $1.99! gotta love that. a quick zip through the sewing machine and i've got myself some inexpensive and kid-proof covers for my cusions!
i seriously need to invest in some lighting and photography lessons. my pictures are dismal. i keep waiting for the sun to come out...but, after two months of rain it's not looking good! take a look at my blog of the week, heather bailey. her whole site is eye candy! her pictures put me to shame. so gorgeous!
Monday, September 1, 2008
wood window treatment
this past week i had a friend ask me if any of my projects turned out in failure. i could answer not really. because, usually, i have a really clear picture of what i want the finished project to look like and how i'm going to build it. i usually don't start a project unless i'm fairly certain it will turn out. and then there was the window treatment....
i remember thinking how simple of a project this would be. yeah...not so much. i haven't cursed this much in a long time! but, i was determined to get it up and working. now that it's up i've decided to take it down and do it another way. but, i'll show you what it looks like now.
the idea was to create a window treatment out of 1/8" mdf panels that could be decorated in any pattern. just four panels on a track.
the front panel is painted white, so that when it's open it blends into the room. when the treatment is closed it reveals the three other designed panels.
i attached pieces of track to a piece of wood that i then attached to the inside of the window. i used pieces of chain to attach the wood to the track sliders.
i still need to figure out a smoother way for the panels to open up and a better way to have the first panel open up the consecutive panels. that's next.
i used a debbie travis' stencil for the design, one in red and one in orange.
Monday, August 25, 2008
a sidebed for a baby (or cat...)
damion left for volleyball camp with our digital camera in tow. that leaves me with no project picture this week. which, really, isn't such a bad thing because i'm ready to throw my window treatment project out the window. so, i wracked my brain about what to show you this week. i think i've dug up almost every project i've ever worked on already!! then i remember my 'cat in the sidebed' picture.
eden slept in our room for the first few months. we had her in the little bassinet on the floor by our bed at first. then, one day, i came across this brilliant idea. a side bed. because we have a platform bed i could make a knock off that i could screw right into the wood of the bed base. although the bottom piece was long enough that when it was slipped under the mattress the weight of the bed kept it pretty securely in place. i made it out of 3/4" plywood. the foam came from the local craft store.
i can't tell you how many times i thanked the designer of this little bed during the 3am feedings (and apologized for ripping off the idea)! it was perfect.
i have a whole series of pictures of my cat, oli, sleeping in eden's things. i think it was his way of adapting to her presence. i have him in her car seat, her bassinet, her little vibrating seat, her sidebed...not her big crib though, sadly oli is too fat to make the jump up and over!
Monday, August 18, 2008
window treatments
i try to keep my home as bright and sunny as possible. for me, that has meant minimal (read, only two in my whole house) window treatments. great in the summer, maybe not the best during a drafty winter. i shouldn't be thinking about winter yet, but we just got a notice from the oil company telling us that our bill is going up by $100 a month this winter! so, i've come up with a window treatment idea that will keep out the drafts and maybe even help heat the place up a bit. while i work away on my prototype i'm showing you the window treatment i currently have in our master bedroom.
i apologize for the terrible picture quality. i should have waited until the sun came over to the front side of the house before taking pictures. they are very dark.
i got the idea for a pulley system type of window treatment from watching an old episode of Home to Go . i took a piece of fabric that i backed with blackout material and wrapped the top and bottom hems around wooden dowels cut to size. i screwed in two eye hooks to the top dowel (through the fabric) and attached rope to each of the two eye hooks. i then threaded the rope through two pulleys that i attached to either side of the top of the window.
it's great. it works just like a pulley - when you pull on the string the curtain goes up and when you let the string go slack the curtain goes down.
the paper laterns on the ceiling have been there for awhile. i love laying in bed and watching them sway to the wind. it probably is time to swap them out for something new, maybe something a bit more colourful. i'll keep my eyes open for new ideas!
Monday, August 11, 2008
swatch storage
i created a place to hang our coats and store our shoes...but, what about the piles of hats, scarves and ever multiplying supply of canvas bags (you know, the ones that you buy for the grocery store but inevidably end up forgetting and having to buy more and then before you know it you wonder why you have so many of these damn bags!)...
so, i created a little storage for all that stuff and managed to hide my washer and dryer a bit from the outside world at the same time - my laundry is in my entrance way.
this storage is my 'signature' white box. yes, i know, i love white boxes! for this one i added a series of 1/2" holes that i placed paint swatches behind to get a gradient look. i added one row of black swatches to help blend in with my big black tree hook.
Monday, August 4, 2008
summertime relaxing
i have been la-zy! part of it has been imposed (my husband is in full swing beach volleyball coaching mode - which doesn't leave a whole lot of time for me to get away and work on my projects) and part of it has just been that i'm loving the summertime. as a canadian, the sunny days are especially precious to me - if you've ever spent 8 months wishing for nice weather you can understand! so, all i have to show for my week away are some photos of the place i have been spending all of my time...my back yard.
one of the great things about living in the country (if you can call 20 minutes outside of the city county!) is not having to worry about what the neighbours think! because i'm pretty sure our neighbours would think we were crazy. i mentioned that my husband was a beach volleyball coach so it may not seem too crazy that we have a regulation sized beach volleyball court in our backyard. add a trampoline, a big fire pit, a hammock and all sorts of space to run and play and you can see why i've chosen to spend more time outside relaxing than inside working!
Monday, July 28, 2008
Monday, July 21, 2008
bathroom mirror
when i was a teenager my parents bought my sister and i the 'coolest' mirrors from ikea. i have dragged these mirrors around with me on every move since i was 18. they have been used in all sorts of different designs. this is just the latest.
i rarely work with hardwoods. but, for this design, i definitely wanted to splurge and work with mahogany. what a gorgeous wood to work with...makes it hard to go back to mdf!
this is a simple design made of up just four pieces of wood. the only details are a drilled out hole for a cup and making sure the top shelf is thinner than the bottom to allow for the mirror to rest on a slight angle. i hung the shelf up using l brackets (attach to the wall first, rest the shelf on it and then attach the shelf).
update - shoe storage
in last week's post i promised you i would upload a photo of the finished project...here it is, shoe storage and all.
i followed not martha's directions. her directions called for 2" l brackets for hanging...but, i think i'm going to have to swap them out for larger ones. the shelves are definitely drooping under the weight of the shoes (my shelves are a bit longer than hers were - and, i'm sure the shelf was meant for cute stylish shoes, not my and damion's big clunky sneaker collection!).
Monday, July 14, 2008
tree hook
ok, i may be going through a bit of a phase. i love the whole wall vinyl trend that is happening right now. big bold graphics on the wall are appealing to me. after months of struggling with a bulky (and an unfinished) storage unit i built for coats and shoes in my foyer i decided it was getting the boot. i wanted something simple and bold. this design fit the bill.
so, again, i set out with my handy projector and some black paint. added in some wooden handles painted black and a simple coat rack was born.
now, i had planned to show you the shoe rack i've built to go along with this...but, i ran out of screws to attach it to the wall! so, once i hit canadian tire i'll upload the finished project. months ago i stumbled on a very cool diy shoe rack design on the blog not martha. so, i've pinched the idea. stay tuned.
my old door
as much as a flop as my old storage unit was (truly, a huge flop) i really like the design i had for the door (that, btw, was never attached to the storage unit - yes, picture us moving a six foot tall door every time we wanted a jacket or pair of shoes!). here is a quick pic of the door. i made the holes using my big drill bits and put pieces of wood veneer behind the cut outs.
colouring
last week i featured the blog doodlage in my new feature - blog of the week. on friday RaShell posted about colouring, one of my favourite stress relievers. when is the last time you went out and got yourself some brand new colourful markers and a sweet design to colour? i'm telling you, you'll fall in love with it all over again!
crayola really needs to come up with a 'flesh' colour line! i can't find a 'flesh' coloured marker anywhere! so, for now my fairie princess remains painfully white! (kind of like me in a bathing suit!)
Sunday, July 6, 2008
van's bench
when damion and i decided it was time to have a baby, my sister, julie, and her husband were deciding it was time to have their second baby. we both ended up pregnant within weeks of each other. she had her gorgeous 'little man, van' and i had eden (who is, of course, also gorgeous!).
as the kids got older, julie noticed that van was missing certain physical developmental milestones. after taking him in for tests and an appointment with the neurologist, van was diagnosed with spinal muscular atrophy type II. SMA is a rare genetic condition that affects the proximal (closest to the trunk) muscles of the body.
julie asked me to build van a little bench and stool (the stool is still in the works) for his physio exercises. of course. but, a cool kid like van definitely needs a cool bench. so, i photoshopped the vans sneaker logo and a funky graphic to produce this design. i projected it onto the wood and painted it black. julie is going to take care of the finishing touches (adding a bit of colour and varnishing it).
for more information on SMA visit the families of sma or fightsma.org.
i'm still deciding how to design the stool...if you have any suggestions, let me know.
new blog of the week feature
one of my new favourite pastimes seems to be scoping out neat blogs online. i get a little thrill when i find a cool new-to-me blog. when my cousin spent 6 weeks recovering from a surgery i sent her a new website everyday to help keep the boredom away. now that she's up on her feet again i've missed digging around the internet with purpose. so, i've decided to start a new feature here. every week i'll post a link to a blog i love. find it in the sidebar.
Friday, June 27, 2008
birthday fun
we celebrated eden's 1st birthday with family and friends over the weekend. i was looking for a reason to make these crazy pom-pom decorations i saw on martha stewart's site for awhile. so, with the help of my sister-in-law and mother-in-law we made a room full.
inpired by my favourite cupcake blog, i made a tower of cupcakes instead of the traditional birthday cake. yes, and the kitchen is still in one piece (if you knew how bad of a cook/baker i was you could appreciate that like my husband does!).
i made some monogrammed 'e' cupcakes for fun. i printed off an e onto a transparency to create the template. you can see that after close to a dozen i gave up on that idea and just started in with the sprinkles!
this cupcake was shown no mercy by eden! it ended its existence as a ball of mush!
dressing up work walls
i'm carrying on with a pom-pom theme....
when i returned to work from maternity leave i was presented with a very white new office. we are limited to what we can do to the space we are given (my day job is at a pretty conservative firm). wall vinyls seemed like just the thing. they have been popping up everywhere so i headed over to etsy where i found a shop called elephannie. i love my pom-poms!
starting out with a wall vinyl that has a hundred little parts probably wasn't the greatest idea. that's something i should have work up to. i'm glad i came into work early to put them up...i spent an hour struggling and swearing up a storm!
well worth it!
Sunday, June 22, 2008
a painted floor
who says carpet and hardwood are the only options for your floor? after years of complaining about my berber carpet (aka the worlds largest scratching post!) i came home to a carpet-less room compliments of my husband. i knew right away i wanted a white shiny floor. every expert i talked to said i was crazy...but, haven't painted floors been around for years? so, i picked up some huge sheets of 1/8 birch plywood and had it cut down to 2 x 4 tiles. i glued and screwed it into the floor (knowing i can always lay alternate flooring over it in the future if i wanted to). my husband took care of the priming and painted. the result is a floor solution that cost me around $150!
this picture shows you a close-up of the birch plywood over the sub floor.
the rest of the room leaves a lot to be desired. but, oh, the posting possibilities!
this picture shows you a close-up of the birch plywood over the sub floor.
the rest of the room leaves a lot to be desired. but, oh, the posting possibilities!
Sunday, June 8, 2008
a knife holder
* my family and i just got back in to our house last night after being evacuated because of a local brush fire. everyone is ok, but it was interesting to see what you really would take with you in case of a fire. once we had eden and the cats packed up it was all about our pictures. our wedding album and a couple of framed pics. everything else wasn't given a second thought (well, i lie...i did think about my tools!). just goes to show you the rest of it is just stuff. and, speaking of stuff...here's an old project.
i was working on a project for my day job that required bamboo skewers. after playing around with a bunch of them i thought 'hey, this would make a cool pen holder', which turned into 'hey, this would make a cool knife holder'. so, i made a cool knife holder. then some guy in australia made a cool knife holder too. and, we all know how that turned out. they are all over the place now.
the design was even featured on "She's Crafty". here is the project plan.
*i don't have a pic of my original knife holder build, the knife holder shown here was built by my friend Louie.
Subscribe to:
Posts (Atom)